Documentation Index
Fetch the complete documentation index at: https://docs.yourhomie.ai/llms.txt
Use this file to discover all available pages before exploring further.
This option works for all platforms that allow custom JavaScript injection. Works with any website that supports HTML.
Installation Options
You can choose between two installation methods:
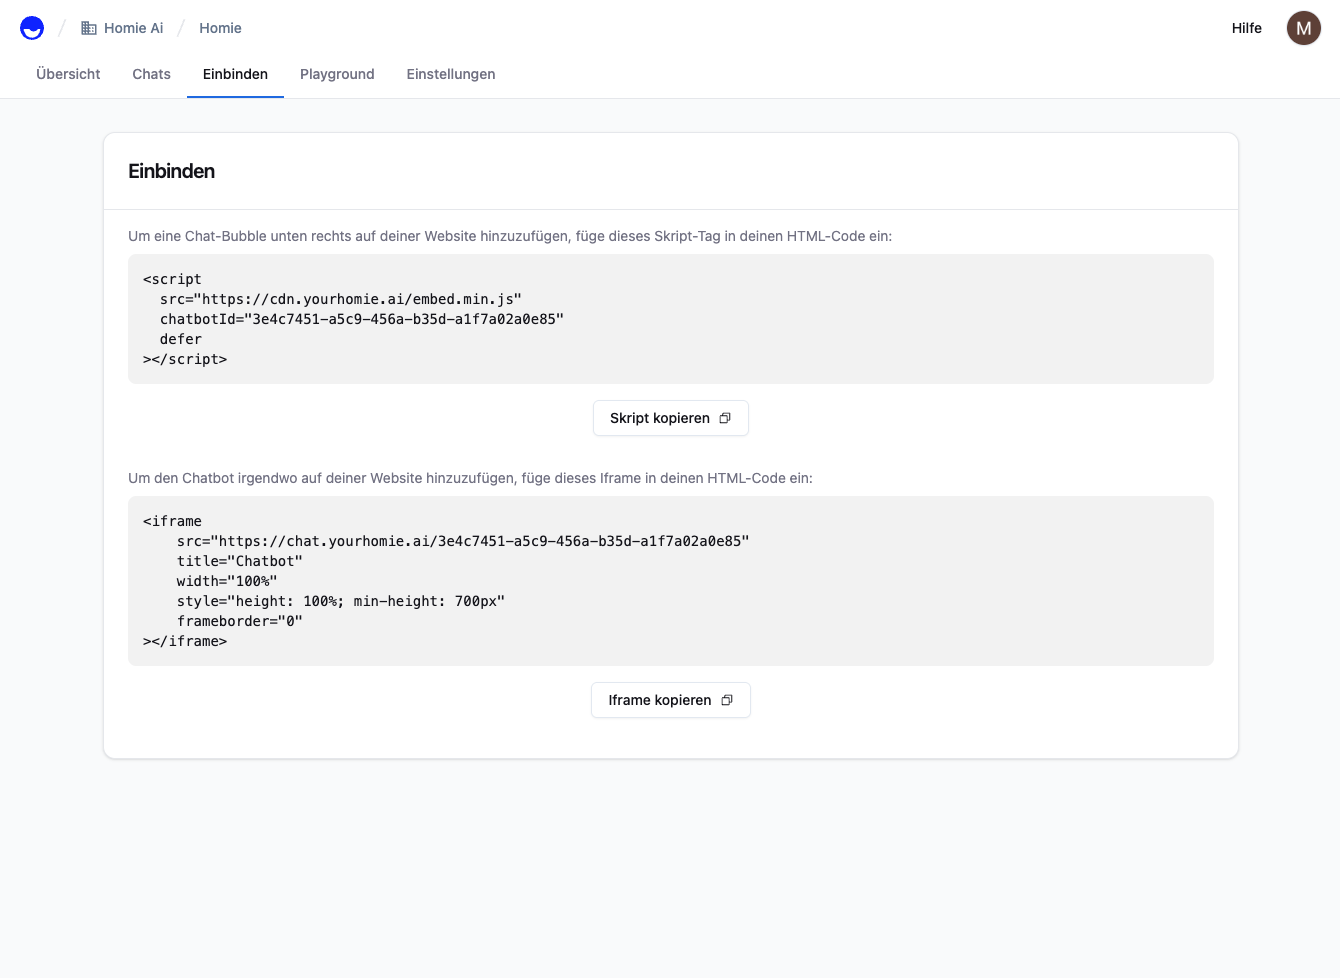
This is the simplest method and is recommended if you only need basic integration.Add the following script tag before the closing </body> tag of your HTML page:<script
src="https://cdn.yourhomie.ai/embed.min.js"
chatbotId="a1b2c3d4-e5f6-7890-abcd-ef1234567890"
domain="https://chat.yourhomie.ai"
defer
></script>
Optional: Add Store Parameter
If you need a store parameter, add the storeId attribute:<script
src="https://cdn.yourhomie.ai/embed.min.js"
chatbotId="a1b2c3d4-e5f6-7890-abcd-ef1234567890"
domain="https://chat.yourhomie.ai"
storeId="your-store-id"
defer
></script>
Replace a1b2c3d4-e5f6-7890-abcd-ef1234567890 with your own chatbotId from the Homie
Dashboard.
This method offers more control and is suitable if you want to set the configuration dynamically.Add the following script before the closing </body> tag of your HTML page:<script>
(function () {
window.homieBotConfig = {
chatbotId: 'a1b2c3d4-e5f6-7890-abcd-ef1234567890',
domain: 'https://chat.yourhomie.ai',
};
var script = document.createElement('script');
script.src = 'https://cdn.yourhomie.ai/embed.min.js';
script.defer = true;
if (document.readyState === 'loading') {
document.addEventListener('DOMContentLoaded', function () {
document.body.appendChild(script);
});
} else {
document.body.appendChild(script);
}
})();
</script>
Optional: Add Store Parameter
If you need a store parameter, add storeId to the configuration:<script>
(function () {
window.homieBotConfig = {
chatbotId: 'a1b2c3d4-e5f6-7890-abcd-ef1234567890',
domain: 'https://chat.yourhomie.ai',
storeId: 'your-store-id',
};
var script = document.createElement('script');
script.src = 'https://cdn.yourhomie.ai/embed.min.js';
script.defer = true;
if (document.readyState === 'loading') {
document.addEventListener('DOMContentLoaded', function () {
document.body.appendChild(script);
});
} else {
document.body.appendChild(script);
}
})();
</script>
Replace a1b2c3d4-e5f6-7890-abcd-ef1234567890 with your own chatbotId from the Homie
Dashboard.
Where do I find my chatbotId?
Open your assistant in the Homie Dashboard → Connect and copy your chatbotId from the displayed script snippet.
Test Installation
- Save your HTML file.
- Reload the page in your browser.
- The Homie chat bubble should appear in the bottom-right corner.
- Click on the bubble to test if the chat works.
Troubleshooting
- No bubble visible? Clear your browser cache or test in incognito mode.
- Script not loading? Check the browser console for error messages.
- Wrong chatbotId? Make sure you’re using the correct ID from the dashboard.