> ## Documentation Index
> Fetch the complete documentation index at: https://docs.yourhomie.ai/llms.txt
> Use this file to discover all available pages before exploring further.
# Team
> Invite members, assign roles, and control per-assistant access in your workspace.
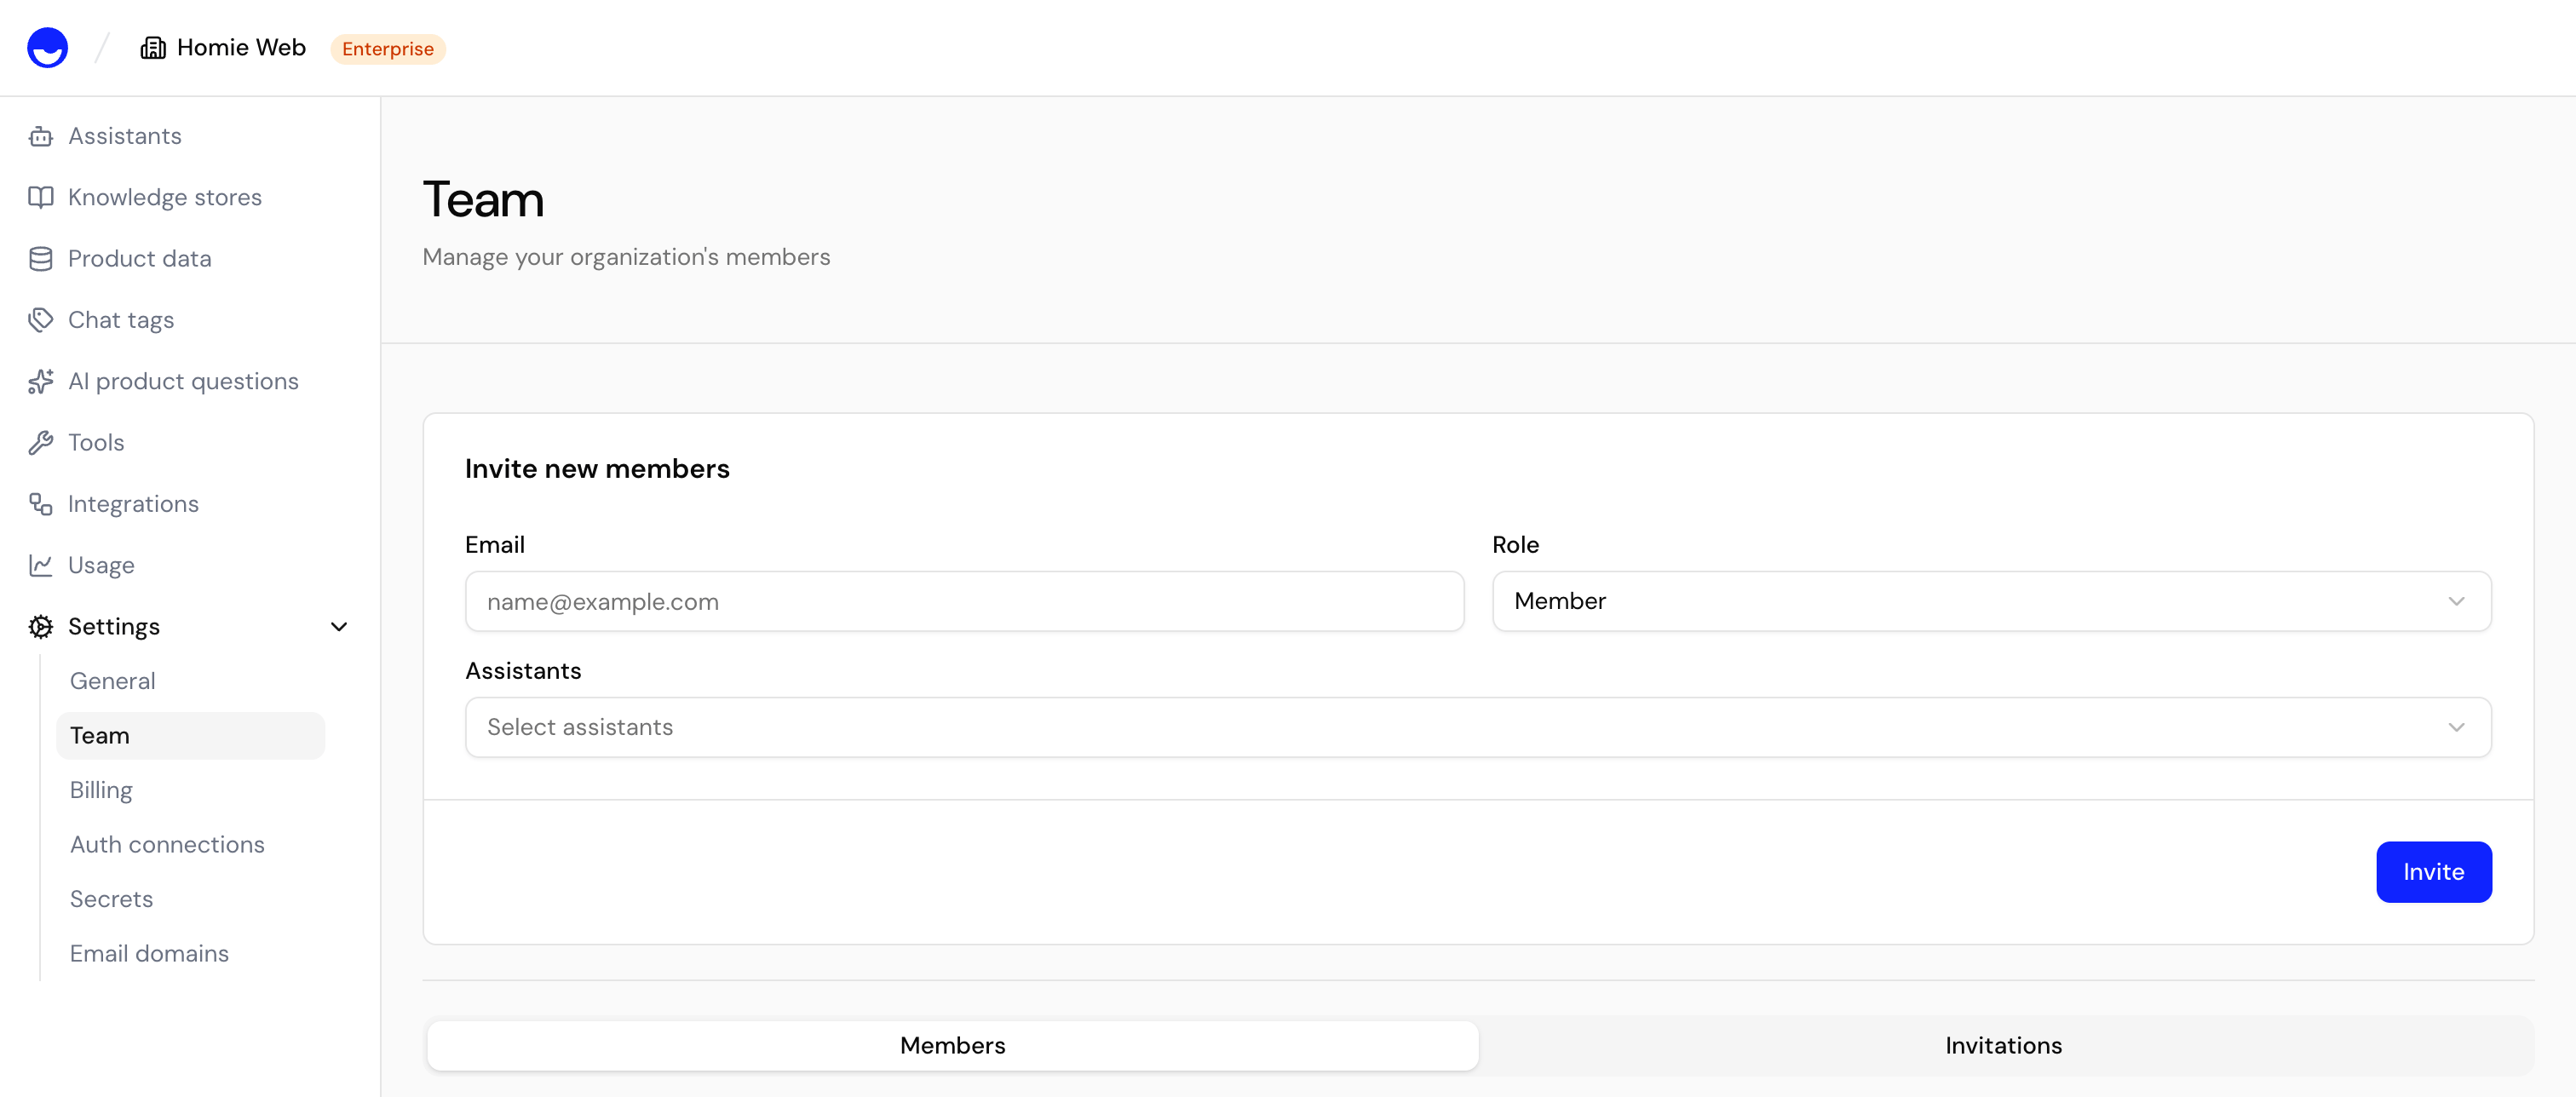
Your team is the set of people who share a [workspace](/en/user-guide/settings/workspace). Invite colleagues, assign them roles, and decide which assistants each member can work with. Open **Settings → Team** to manage your team.
Inviting and removing members, and changing roles, requires an **Owner** or **Admin** role.
## Invite members
1. Open **Settings → Team**.
2. Select **Invite**.
3. Enter the teammate's email address and choose a role.
4. Select the assistants the member should be able to see.
5. Send the invitation. The pending invite appears under **Invitations** until they accept.
 Invitation links expire after 48 hours. If one expires before it's accepted, simply send a new invitation — the old link stops working.
## Roles and permissions
Each member has one of three roles — **Owner**, **Admin**, or **Member** — that defines what they can do in the workspace. **Member** is the most limited role and is effectively view-only.
| Capability | Member | Admin | Owner |
| ------------------------------------------------------------ | :----: | :---: | :---: |
| View assistants, conversations, and usage | ✅ | ✅ | ✅ |
| Create, edit, and delete assistants | ❌ | ✅ | ✅ |
| Train assistants and manage knowledge and tools | ❌ | ✅ | ✅ |
| Invite and remove members, change roles | ❌ | ✅ | ✅ |
| Manage workspace settings, secrets, domains, and connections | ❌ | ✅ | ✅ |
| Manage billing and plan | ❌ | ❌ | ✅ |
| Control per-assistant access | ❌ | ❌ | ✅ |
| Delete the workspace, transfer ownership | ❌ | ❌ | ✅ |
### Change a member's role
In the members table, open the role dropdown next to a member and select a new role. The change takes effect immediately.
### Remove a member
Use the action menu next to a member to remove them. They lose access to the workspace right away. Pending invitations can be revoked the same way before they're accepted.
## Per-assistant access
Beyond workspace roles, you can restrict which assistants a member can work with. Use **Assistant access** next to a member to grant or revoke access to individual assistants — useful when you want to give a teammate access to specific assistants without exposing the whole workspace.
By default, a member with no restriction set can access every assistant in the workspace.
Changing per-assistant access requires the **Owner** role.
## Next steps
Manage your organization's name and membership.
Review your subscription and message quota.
Invitation links expire after 48 hours. If one expires before it's accepted, simply send a new invitation — the old link stops working.
## Roles and permissions
Each member has one of three roles — **Owner**, **Admin**, or **Member** — that defines what they can do in the workspace. **Member** is the most limited role and is effectively view-only.
| Capability | Member | Admin | Owner |
| ------------------------------------------------------------ | :----: | :---: | :---: |
| View assistants, conversations, and usage | ✅ | ✅ | ✅ |
| Create, edit, and delete assistants | ❌ | ✅ | ✅ |
| Train assistants and manage knowledge and tools | ❌ | ✅ | ✅ |
| Invite and remove members, change roles | ❌ | ✅ | ✅ |
| Manage workspace settings, secrets, domains, and connections | ❌ | ✅ | ✅ |
| Manage billing and plan | ❌ | ❌ | ✅ |
| Control per-assistant access | ❌ | ❌ | ✅ |
| Delete the workspace, transfer ownership | ❌ | ❌ | ✅ |
### Change a member's role
In the members table, open the role dropdown next to a member and select a new role. The change takes effect immediately.
### Remove a member
Use the action menu next to a member to remove them. They lose access to the workspace right away. Pending invitations can be revoked the same way before they're accepted.
## Per-assistant access
Beyond workspace roles, you can restrict which assistants a member can work with. Use **Assistant access** next to a member to grant or revoke access to individual assistants — useful when you want to give a teammate access to specific assistants without exposing the whole workspace.
By default, a member with no restriction set can access every assistant in the workspace.
Changing per-assistant access requires the **Owner** role.
## Next steps
Manage your organization's name and membership.
Review your subscription and message quota.