> ## Documentation Index
> Fetch the complete documentation index at: https://docs.yourhomie.ai/llms.txt
> Use this file to discover all available pages before exploring further.

# WordPress

> Add the homie AI chat widget to your WordPress site via a footer, a header/footer plugin, or a Custom HTML block.

You can add homie AI to any WordPress site by placing the embed script in the page footer so it loads everywhere. A header/footer plugin is the simplest option, but you can also use your theme footer or a Custom HTML block.

<Note>
  Before you start, make sure you have:

  * An assistant created on the platform
  * Your embed script copied from the assistant's **Publish** area
  * Admin access to your WordPress site
</Note>

## Add the script to your site

<Steps>
  <Step title="Copy your embed script">
    Open your assistant on the platform, go to its **Publish** area, and copy the script. It already contains your `chatbotId`.
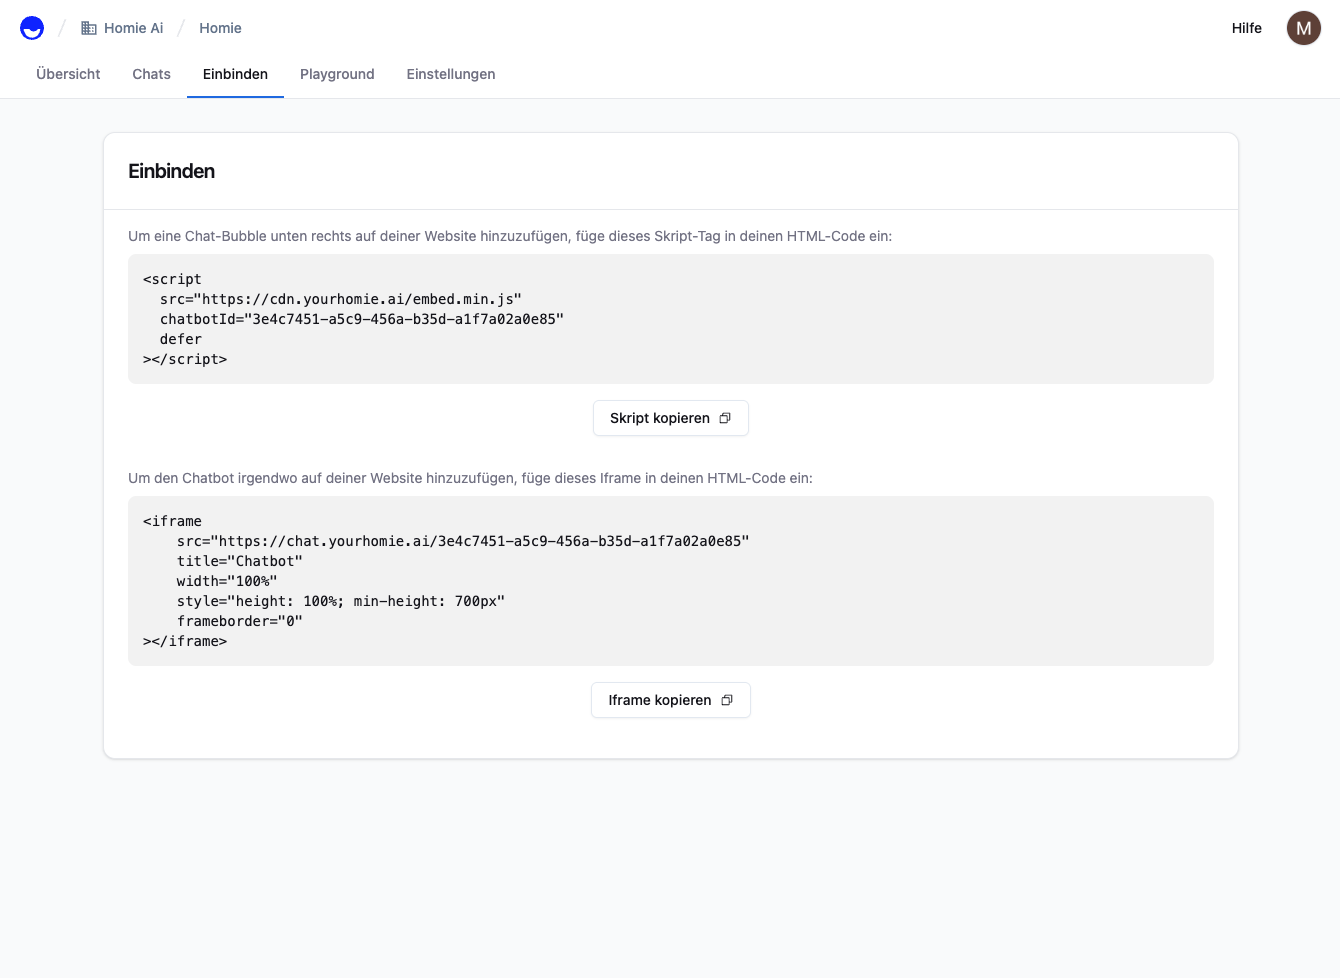
    <Frame>
      <img src="https://mintcdn.com/homieai/t1ZSM74lXOpzsQLS/images/integrations/connect.png?fit=max&auto=format&n=t1ZSM74lXOpzsQLS&q=85&s=ddc2630812f2d8706ba54bc3b19cb1a3" alt="Platform Publish area showing the copyable script snippet" width="1340" height="978" data-path="images/integrations/connect.png" />
    </Frame>
  </Step>

  <Step title="Choose how to add it">
    <Tabs>
      <Tab title="Plugin (recommended)">
        Install a plugin such as **Insert Headers and Footers** (or **WPCode**), open its settings, and paste the script into the **Footer** / **Body** section:

        ```html theme={null}
        <script
          src="https://cdn.yourhomie.ai/embed.min.js"
          chatbotId="YOUR-CHATBOT-ID"
          defer
        ></script>
        ```

        Save. The plugin injects the script on every page.
      </Tab>

      <Tab title="Theme footer">
        In your theme editor, open `footer.php` and paste the script just before the closing `</body>` tag. Use a child theme so the change survives theme updates.
      </Tab>

      <Tab title="Custom HTML block">
        For a single landing page, add a **Custom HTML** block in the block editor and paste the script there. Note this loads the widget only on that page, not site-wide.
      </Tab>
    </Tabs>
  </Step>

  <Step title="Save and refresh">
    Save your changes and reload your site.
  </Step>
</Steps>

<Check>
  Refresh your site. The homie chat bubble appears in the bottom-right corner. Open it and send a test message.
</Check>

<Tip>
  Running WooCommerce? See the [WooCommerce guide](/en/user-guide/installation/woocommerce) for the same steps with shop-specific notes.
</Tip>

## Troubleshooting

* **No bubble showing?** Clear any caching plugin and your browser cache, then try an incognito window.
* **Script stripped out?** Some editors sanitize `<script>` tags — use a header/footer plugin instead.

For deeper configuration and methods, see the [Client API](/en/api-reference/client/overview).

## Next steps

<CardGroup cols={2}>
  <Card title="Client API" icon="code" href="/en/api-reference/client/overview">
    Configure the widget and call methods from your site.
  </Card>

  <Card title="Installation overview" icon="plug" href="/en/user-guide/installation/overview">
    Compare install methods for every platform.
  </Card>
</CardGroup>
