> ## Documentation Index
> Fetch the complete documentation index at: https://docs.yourhomie.ai/llms.txt
> Use this file to discover all available pages before exploring further.

# Introduction

> Pick your platform and add the homie AI chat widget to your store with a single embed script.

You install homie AI by adding one small embed script to your store. You copy the script from the platform — it already contains your `chatbotId` — and paste it into your site so it loads on every page. The script is served from `cdn.yourhomie.ai`, is deferred, and stays lightweight on your page.

<CardGroup cols={2}>
  <Card title="Shopify" icon="shopify" href="/en/user-guide/installation/shopify">
    Paste the script into your theme, or use the connected Shopify integration.
  </Card>

  <Card title="Google Tag Manager" icon="google" href="/en/user-guide/installation/google-tag-manager">
    Deploy the widget through a Custom HTML tag — no theme code needed.
  </Card>

  <Card title="Shopware" icon="bag-shopping" href="/en/user-guide/installation/shopware">
    Add the script to your storefront theme or a CMS block.
  </Card>

  <Card title="WooCommerce" icon="wordpress" href="/en/user-guide/installation/woocommerce">
    Use a theme footer, a header/footer plugin, or `functions.php`.
  </Card>

  <Card title="Magento" icon="cart-shopping" href="/en/user-guide/installation/magento">
    Add the script via layout XML or the footer miscellaneous HTML setting.
  </Card>

  <Card title="WordPress" icon="wordpress" href="/en/user-guide/installation/wordpress">
    Add the script via a footer, a header/footer plugin, or a Custom HTML block.
  </Card>

  <Card title="Manual" icon="code" href="/en/user-guide/installation/manual">
    The universal method — works on any site that lets you edit HTML.
  </Card>
</CardGroup>

## How installation works

Every install method does the same thing: it places the homie embed script on your storefront so the chat bubble loads for your shoppers.

<Steps>
  <Step title="Copy the script from the platform">
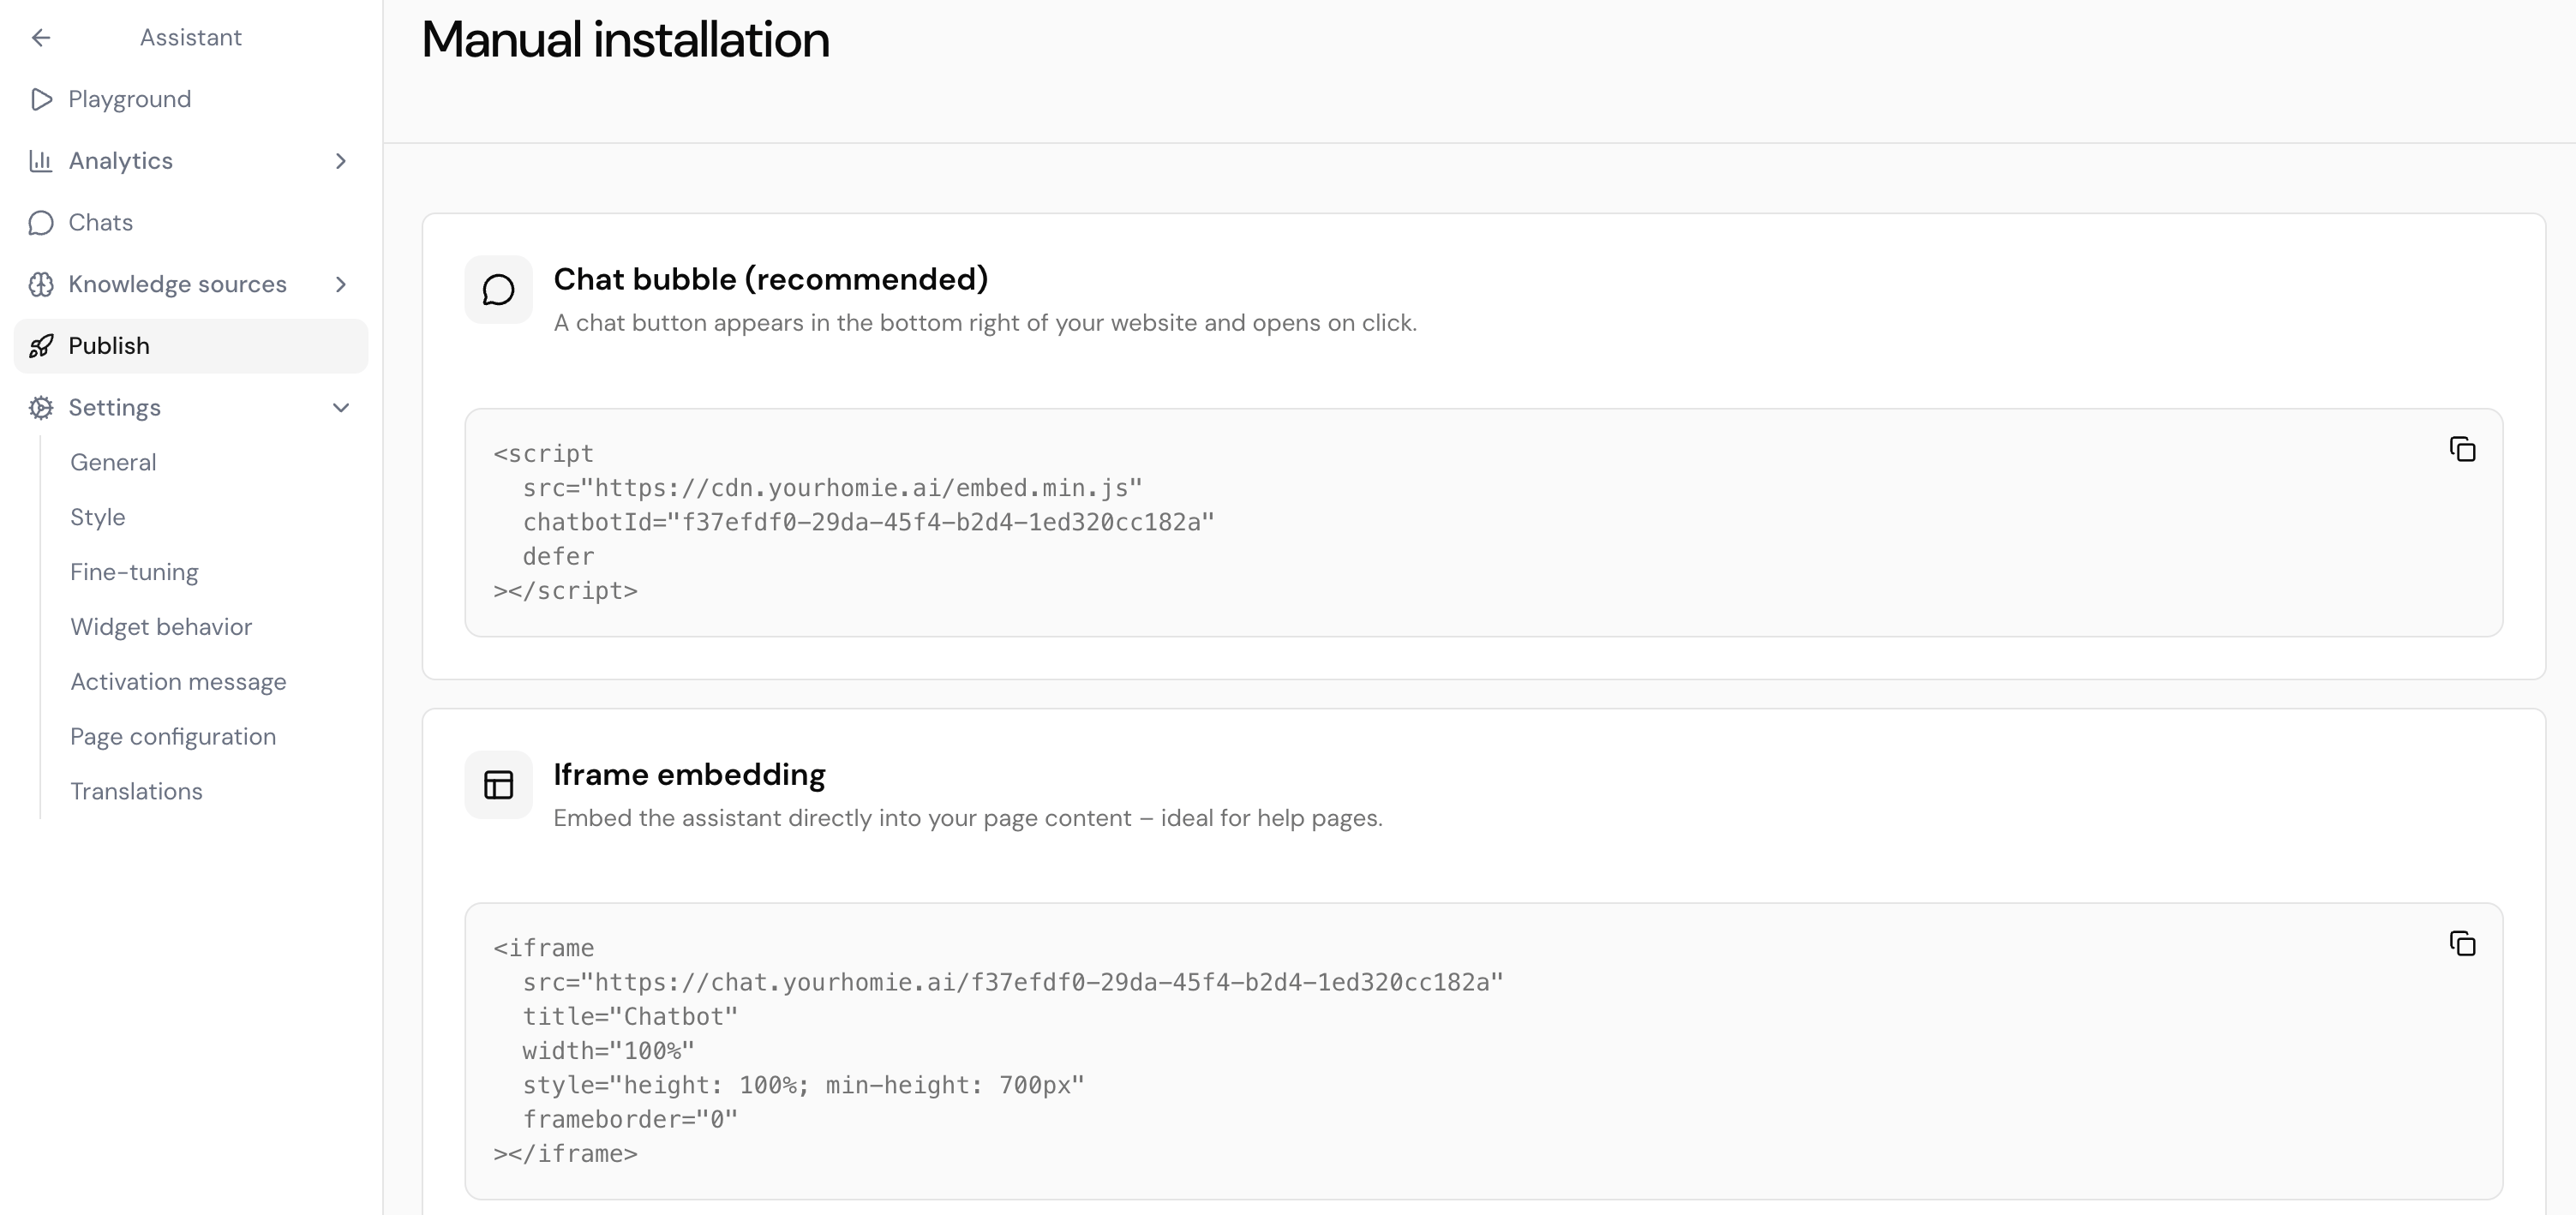
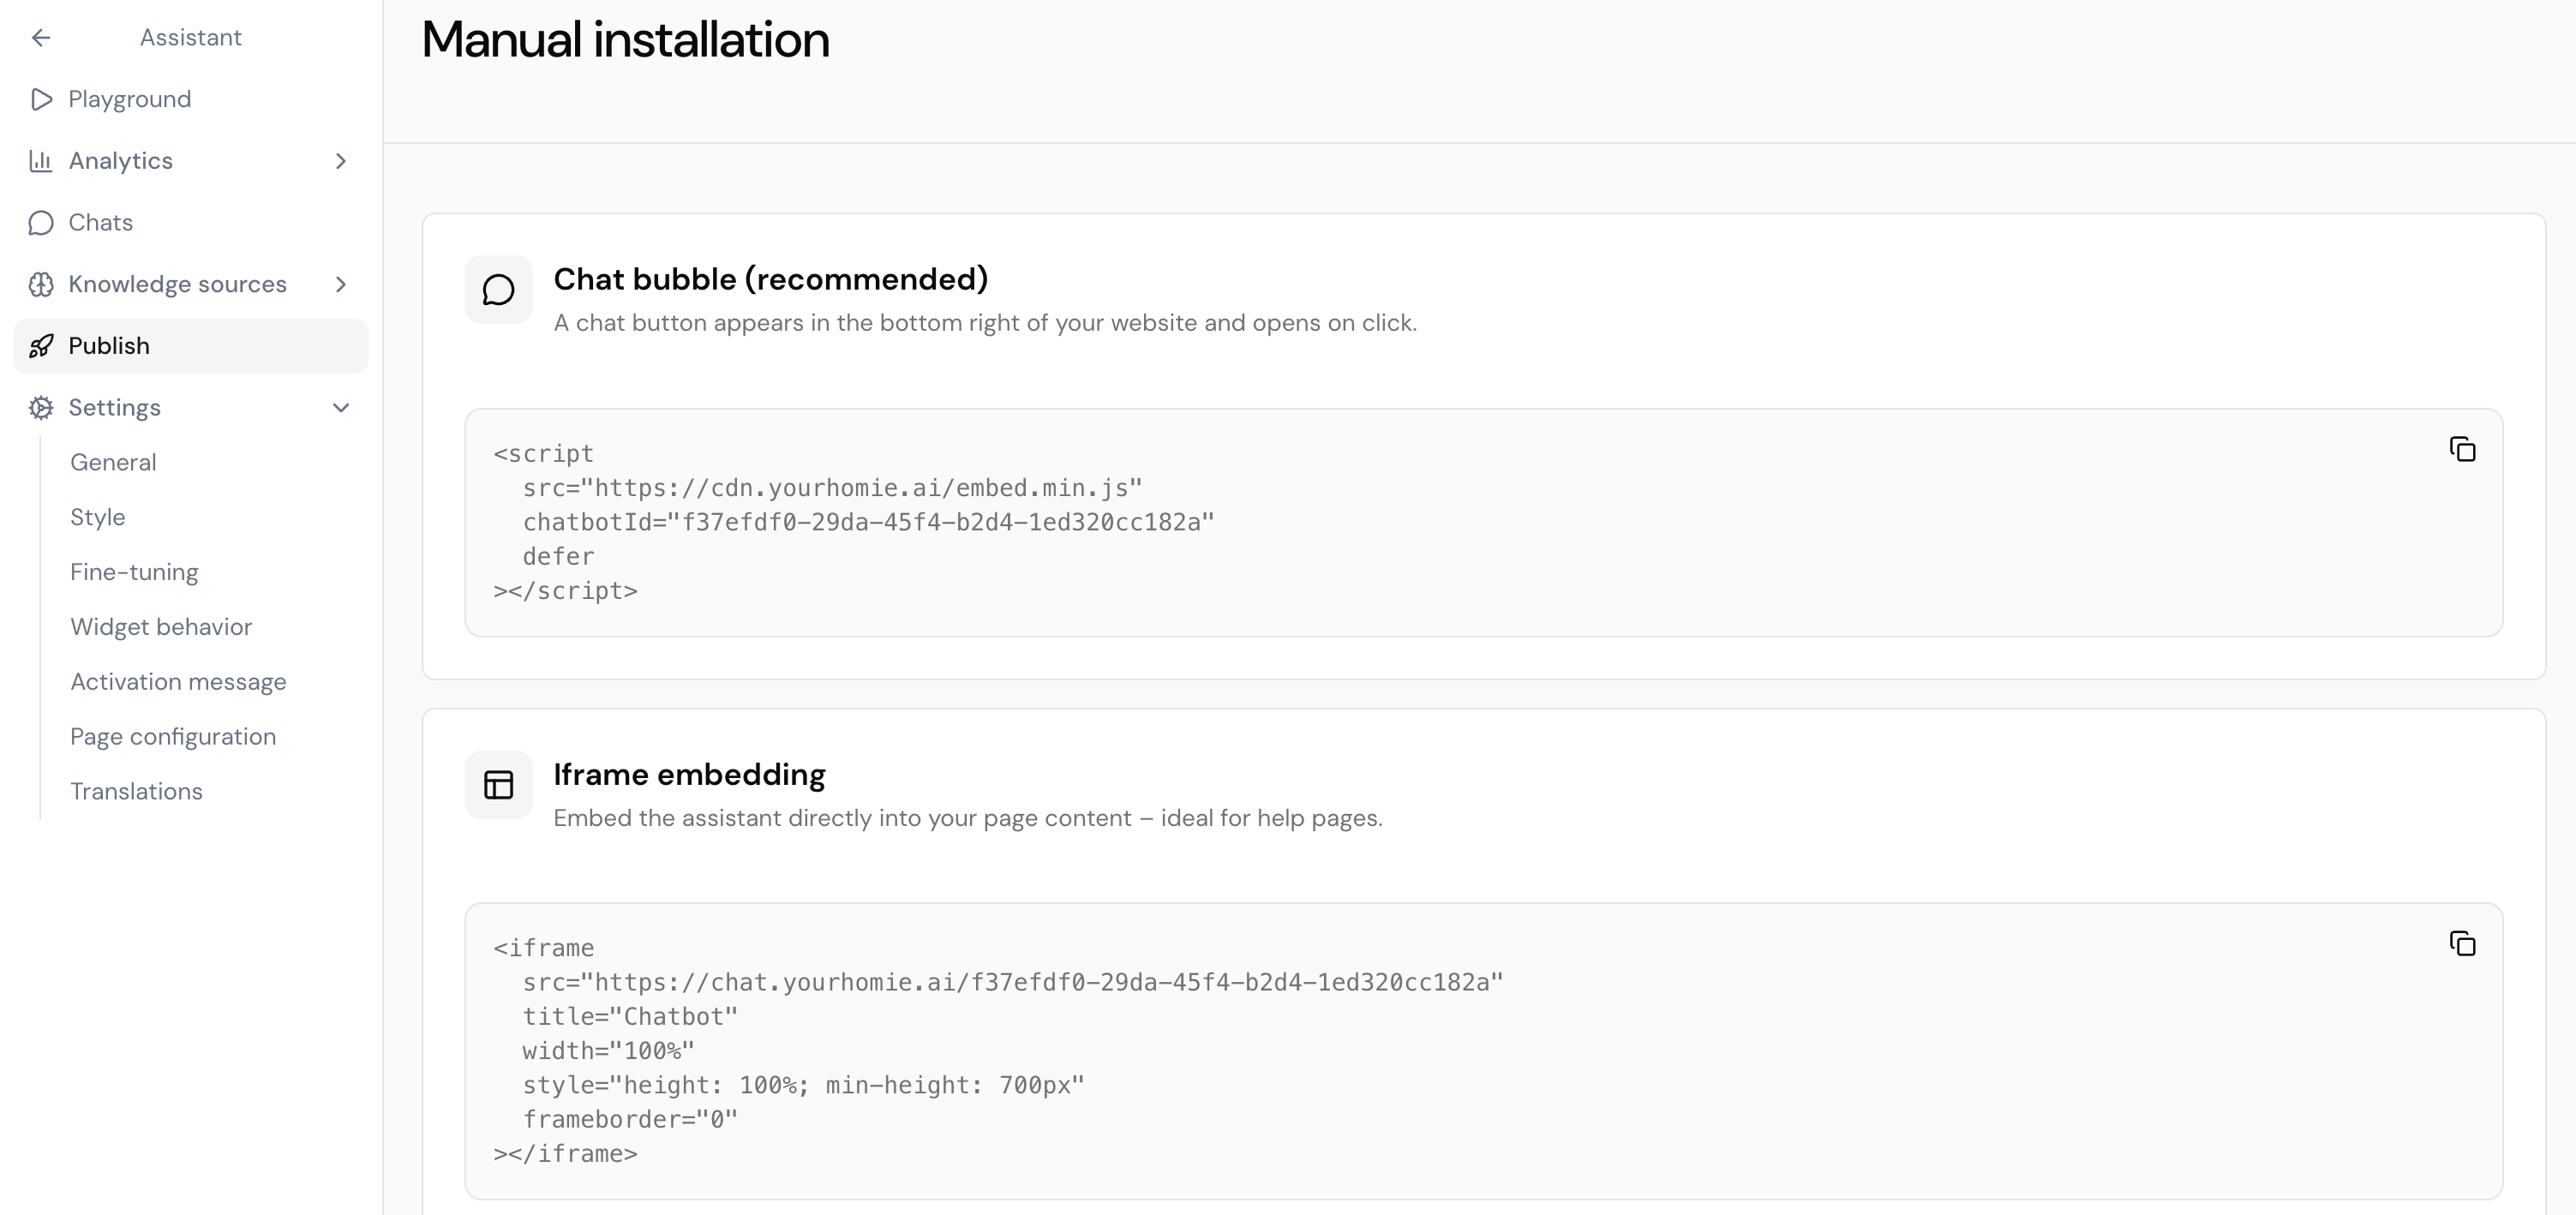
    Open your assistant on the platform, go to its **Publish** area, and copy the script. It already contains your real `chatbotId`.
    <Frame>
      <img src="https://mintcdn.com/homieai/m0ZcYuq9OdpATfdE/images/Bildschirmfoto-2026-07-01-um-10.29.47.png?fit=max&auto=format&n=m0ZcYuq9OdpATfdE&q=85&s=71e139102f4f443ca1e79b345f64fb61" alt="Platform Publish area showing the copyable script snippet" lightAlt="Platform Publish area showing the copyable script snippet" darkAlt="Platform Publish area showing the copyable script snippet" className="dark:hidden" width="3006" height="1418" data-path="images/Bildschirmfoto-2026-07-01-um-10.29.47.png" />

      <img src="https://mintcdn.com/homieai/m0ZcYuq9OdpATfdE/images/Bildschirmfoto-2026-07-01-um-10.29.47-1.png?fit=max&auto=format&n=m0ZcYuq9OdpATfdE&q=85&s=425929cfd0fff299c68a09367f62bf04" alt="Platform Publish area showing the copyable script snippet" lightAlt="Platform Publish area showing the copyable script snippet" darkAlt="Platform Publish area showing the copyable script snippet" className="hidden dark:block" width="3006" height="1418" data-path="images/Bildschirmfoto-2026-07-01-um-10.29.47-1.png" />
    </Frame>
  </Step>

  <Step title="Paste it into your site">
    Add the script to your storefront using the method that fits your platform — usually just before the closing `</body>` tag, or through a tag manager or plugin.
  </Step>

  <Step title="Verify the widget loads">
    Refresh your store. The chat bubble appears in the bottom-right corner. Open it and send a test message.
  </Step>
</Steps>

The canonical embed snippet looks like this:

```html theme={null}
<script
  src="https://cdn.yourhomie.ai/embed.min.js"
  chatbotId="YOUR-CHATBOT-ID"
  defer
></script>
```

<Note>
  Always copy the script from the platform rather than typing it by hand — that way the `chatbotId` is guaranteed to match your assistant.
</Note>

## Compare install methods

| Platform           | Method                                                   | Setup time |
| ------------------ | -------------------------------------------------------- | ---------- |
| Shopify            | Paste into `theme.liquid`, or use the integration        | \~2 min    |
| Google Tag Manager | Custom HTML tag, All Pages trigger                       | \~1 min    |
| Shopware           | Storefront theme template or CMS block                   | \~5 min    |
| WooCommerce        | Theme footer, header/footer plugin, or `functions.php`   | \~5 min    |
| Magento            | Layout XML or footer miscellaneous HTML                  | \~5 min    |
| WordPress          | Theme footer, header/footer plugin, or Custom HTML block | \~5 min    |
| Manual             | Paste `<script>` before `</body>` on every page          | \~2 min    |

## Next steps

<CardGroup cols={2}>
  <Card title="Client API" icon="code" href="/en/api-reference/client/overview">
    Configure the widget, call methods, and listen to events from your site.
  </Card>

  <Card title="Shopify integration" icon="shopify" href="/en/user-guide/integrations/shopify">
    Connect Shopify via OAuth to sync your product catalog.
  </Card>
</CardGroup>
