> ## Documentation Index
> Fetch the complete documentation index at: https://docs.yourhomie.ai/llms.txt
> Use this file to discover all available pages before exploring further.
# Google Tag Manager
> Deploy the homie AI chat widget through a Google Tag Manager Custom HTML tag in under a minute.
You can roll out homie AI through Google Tag Manager (GTM) without touching theme code. This is ideal when several properties share the same container, or when you manage all of your site tags in one place.
Before you start, make sure you have:
* An assistant created on the platform
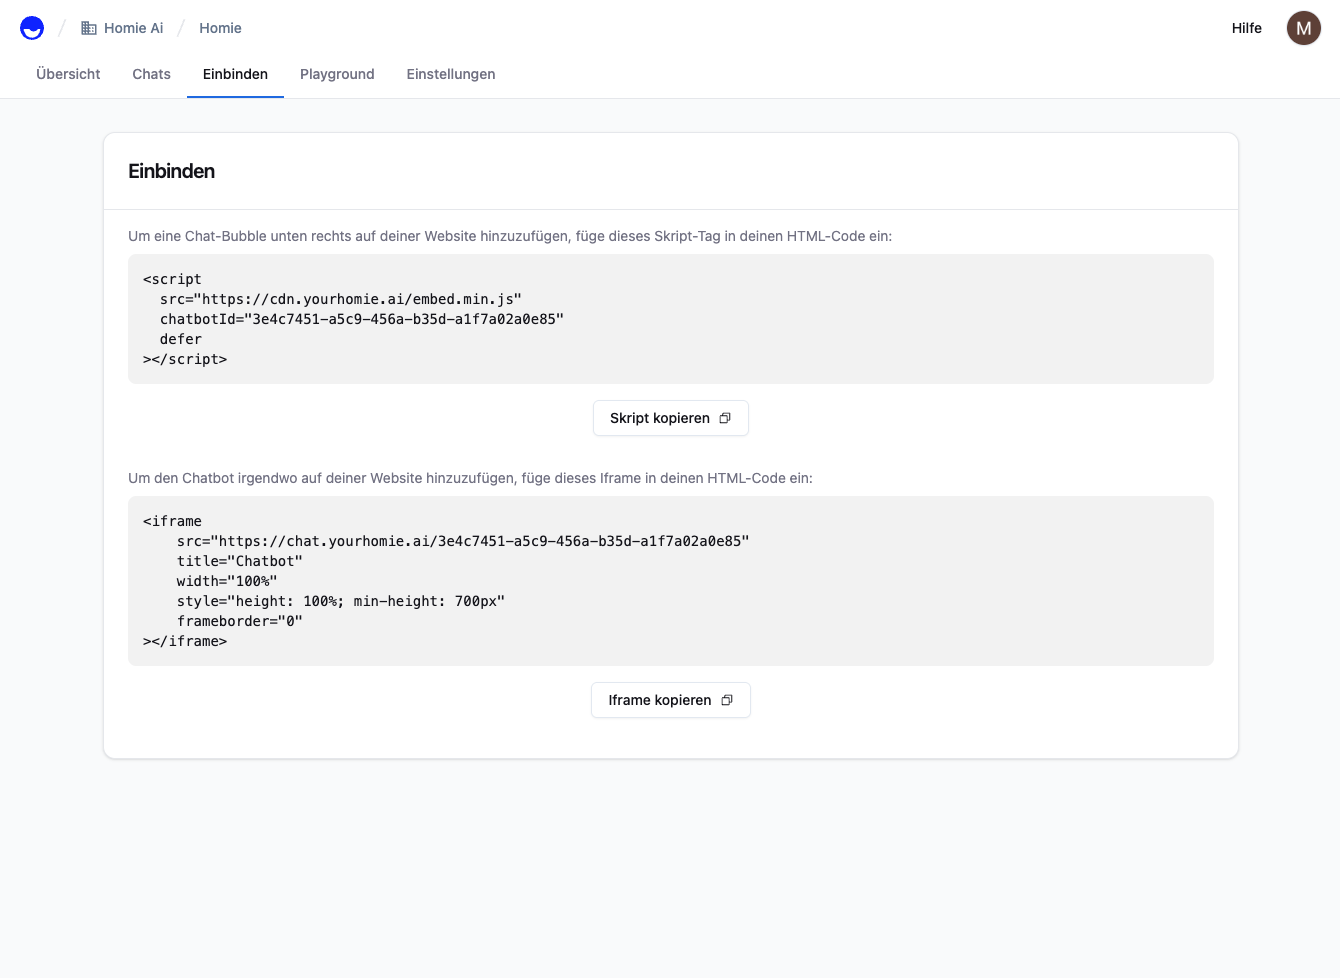
* Your embed script copied from the assistant's **Publish** area
* Access to a Google Tag Manager container on your site
## Add a Custom HTML tag
Open your assistant on the platform, go to its **Publish** area, choose **Google Tag Manager**, and copy the script. It already contains your `chatbotId`.
 Sign in at [tagmanager.google.com](https://tagmanager.google.com), select your container, then choose **Tags → New → Custom HTML**.
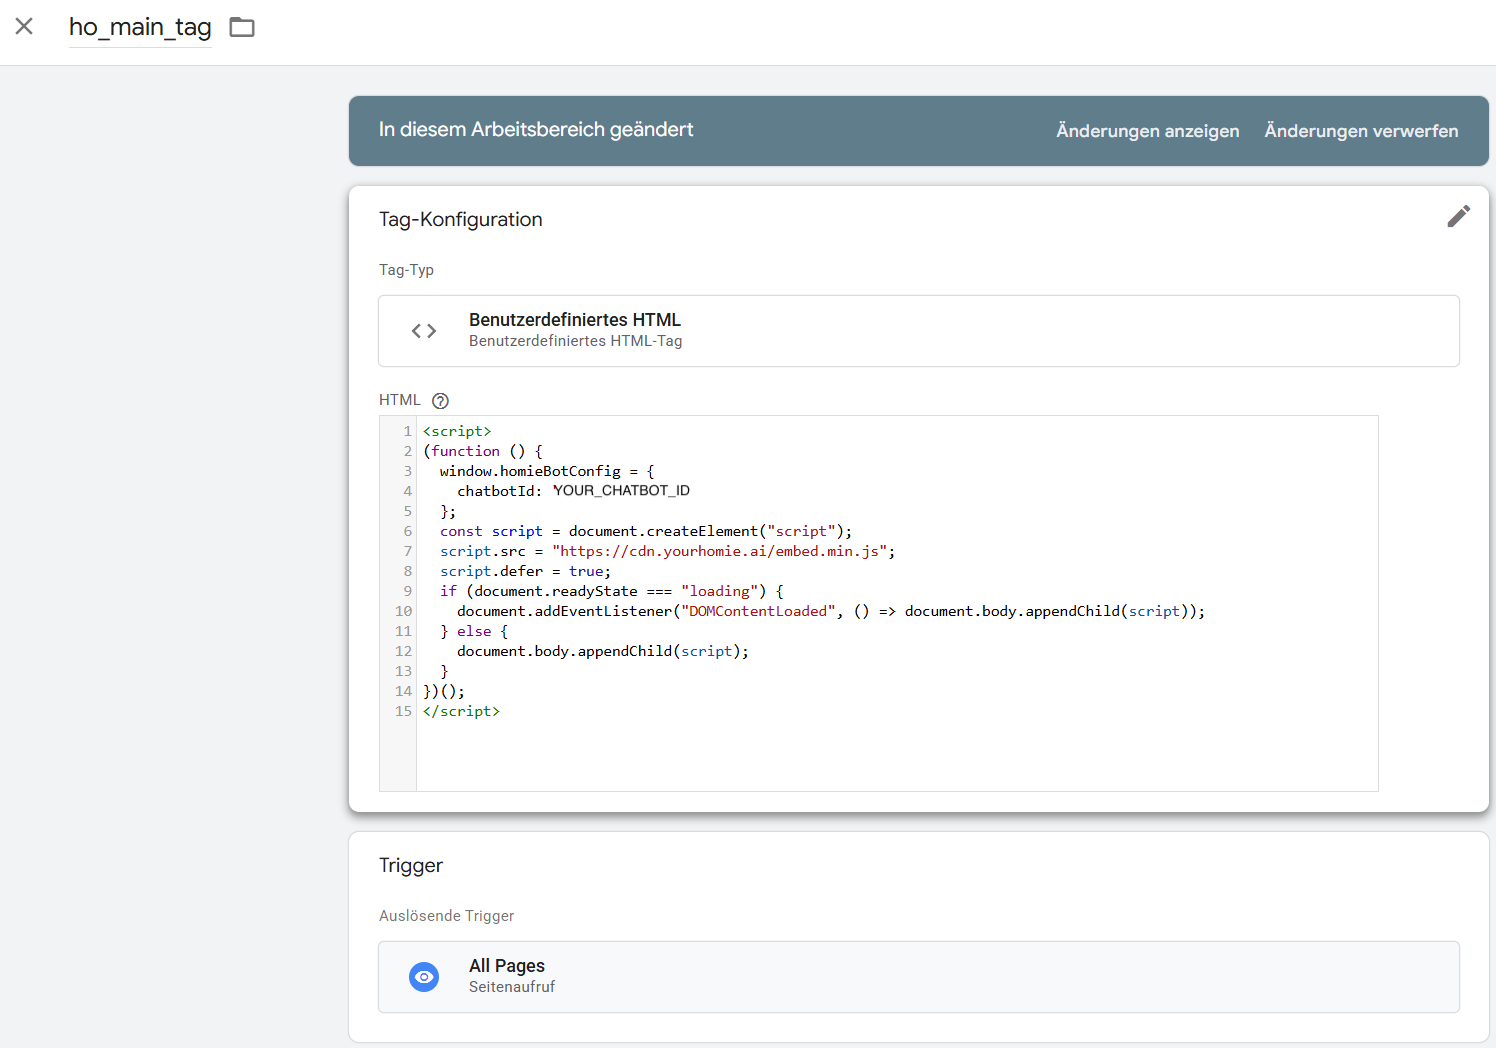
Paste the embed script into the HTML field. The Tag Manager version configures the widget through `window.homieBotConfig` and injects it for you, because Custom HTML tags load scripts in a way that prevents reading attributes directly:
```html theme={null}
```
Choose the **All Pages** trigger so the chat bubble loads site-wide.
Sign in at [tagmanager.google.com](https://tagmanager.google.com), select your container, then choose **Tags → New → Custom HTML**.
Paste the embed script into the HTML field. The Tag Manager version configures the widget through `window.homieBotConfig` and injects it for you, because Custom HTML tags load scripts in a way that prevents reading attributes directly:
```html theme={null}
```
Choose the **All Pages** trigger so the chat bubble loads site-wide.
 Click **Submit**, then **Publish**. GTM deploys the tag immediately.
Refresh your site. The homie chat bubble appears in the bottom-right corner. Open it and send a test message.
Use GTM's built-in environments to test the tag in a preview before you publish to production.
## Troubleshooting
* **Tag fires but no bubble?** Disable any script blockers and clear your cache.
* **Only on specific pages?** Adjust the trigger to a **Page View** rule that matches the pages you want.
* **Multiple environments?** Use GTM environments to validate before going live.
For deeper configuration and methods, see the [Client API](/en/api-reference/client/overview).
## Next steps
Configure the widget and call methods from your site.
Compare install methods for every platform.
Click **Submit**, then **Publish**. GTM deploys the tag immediately.
Refresh your site. The homie chat bubble appears in the bottom-right corner. Open it and send a test message.
Use GTM's built-in environments to test the tag in a preview before you publish to production.
## Troubleshooting
* **Tag fires but no bubble?** Disable any script blockers and clear your cache.
* **Only on specific pages?** Adjust the trigger to a **Page View** rule that matches the pages you want.
* **Multiple environments?** Use GTM environments to validate before going live.
For deeper configuration and methods, see the [Client API](/en/api-reference/client/overview).
## Next steps
Configure the widget and call methods from your site.
Compare install methods for every platform.